Layouting Tutorial
This tutorial describes the NUI Layouting framework, covering the following subjects:
Overview
Setting Layouts
Sizing
Padding/Margins
Minimum/Maximum sizes
Linear Layout
Grid Layout
Flex Layout
Creating custom Layouts
Layouting Overview
The Layouting framework enables Views to be automatically positioned within a parent View that has been assigned a Layout.
The framework offers a common method to layout Views with just minimal setup in the application.
Default layouts e.g Linear and Grid can be assigned to a View, children added to this View will then be positioned
and sized according to that layout in conjunction with specification and properties set on the layout and Views.
New layouts can be implemented by deriving from the Layouting base class and positioning the children in any way required, see Creating custom Layouts for instructions.
The layouting framework allows nested layouting; View with a layout can be added to another View with a layout.
Layouts are instances of specific Layouts
e.g. LinearLayout

e.g GridLayout
A View can be assigned any Layout and re-assigned to a different Layout but a Layout can only be used with one View at a time.
Setting a layout to a View
For a View to perform the desired layouting for its children it needs to have a layout created and set to it. Layouts may need extra settings to be provided, for example a Grid layout can have the number of columns set on it.
Below code snippet creates a View, creates a LinearLayout and then sets the layout on the View.
View parentView = new View();
parentView.Name = "LinearExample";

var layout = new LinearLayout();
layout.LinearOrientation = LinearLayout.Orientation.Horizontal;

parentView.Layout = layout;
In the case about the linear layout has the Horizontal orientation set on it as Linear Layout can be vertical or horizontal.
A View can be assigned a new layout, this will cause it’s children to be repositioned as described by the new layout. A Layout can only be assigned to a single View at a time, trying to assign the same layout to multiple Views will result in only the last assigned View to have that layout. A default Layout will be assigned if a layout is moved from one View to another.
View parentView = new View();
parentView.Name = "LinearExample";

var layoutLinear = new LinearLayout();
layout.LinearOrientation = LinearLayout.Orientation.Horizontal;

parentView.Layout = layoutLinear;

...
someAction.Event += (sender, e) =>
{
  parentView.Layout = new GridLayout();;
}
Code above changes the layout from Linear to Grid on a event occurance.
Sizing and Specifications
There are 3 size specifications available for Views, size specifications are ways to specify the preferred size of Views within the layouting framework. Height and Width are individual so each can be set with a different specification.
1) An explicit value can be provided, either using the existing Size2D, Size API or setting a pixel value to the specification.
View childView = new View();
childView.SetSize2D(90,90);
or
View childView = new View();
childView.WidthSpecification = 90;
childView.HeightSpecification = 90;

2) The LayoutParamPolicies.WrapContent, setting the View’s height or width specification to WrapContent will cause the View to grow or shrink to wrap around the size of it’s children.
View childView = new View();
childView.WidthSpecification = LayoutParamPolicies.WrapContent;
childView.HeightSpecification = LayoutParamPolicies.WrapContent;

3) The LayoutParamPolicies.MatchParent, setting the View’s height or width specification to MatchParent will cause the View to fill the size of it’s parent.
View childView = new View();
childView.WidthSpecification = LayoutParamPolicies.MatchParent;
childView.HeightSpecification = LayoutParamPolicies.MatchParent;
Padding and Margin
Padding and Margins provide additional control within a layout to achieve a desired look.
Both padding and margin are 4 values represented by the Extents class; start, top, end, bottom.
Padding is the internal space between the boundary of the View and it’s content, a View with a layout will have child Views as content whilst a leaf View (ImageView for example) would have an ImageVisual as it’s content.
Padding can be provided to a Layout View to give an offset to it’s children.
View layoutView = new View();
var layout = new LinearLayout();
layoutView.Layout = layout;

layoutView.Padding = new Extents(10,0,10,0);

View childView = new View();
childView.WidthSpecification = LayoutParamPolicies.MatchParent;
childView.HeightSpecification = LayoutParamPolicies.MatchParent;

layoutView.Add(childView);

Margin is the external space around a View. Providing a child View with a margin will offset the positioning of just that child. Whilst setting the padding on the parent View will offset all the children.
View layoutView = new View();
var layout = new LinearLayout();
layoutView.Layout = layout;

View childView = new View();
childView.WidthSpecification = LayoutParamPolicies.WrapContent;
childView.HeightSpecification = LayoutParamPolicies.WrapContent;
childView.Margin = new Extents(10,0,10,0);

View childView2 = new View();
childView2.WidthSpecification = LayoutParamPolicies.WrapContent;
childView2.HeightSpecification = LayoutParamPolicies.WrapContent;
childView2.Margin = new Extents(10,0,10,0);

layoutView.Add(childView);
layoutView.Add(childView2);
Minimum and Maximum Sizes
The layouting framework has control over the size of the Views it lays out. The size of a child view may need to be smaller or larger than it’s natural size or specified size.
To guide the framework a preferred minimum and maximum size can be provided if a preference exists. The layouting system will then try to keep the size of the View within the given values.
Minimum or maximum sizes could be used with the LayoutParamPolicies MatchParent or WrapContent.
If specifying an explicit size and setting the minimum or maximum, ensure the explicit size is within the minimum and maximum boundary.
View childView = new View();
childView.WidthSpecification = LayoutParamPolicies.WrapContent;
childView.HeightSpecification = LayoutParamPolicies.WrapContent;
childView.MinimumSize = new Size2D(200,200);
childView.MaximumSize = new Size2D(400,400);
Available Layouts
Below are the available Layouts that have been implemented and ready to be assigned to Views.
Tables dscribe properties unique to each Layout.
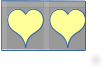
Linear Layout
Positions children in a linear form, one after the other, CellPadding can be provided to insert a space between each child. Unlike generic padding this will not result in a space at the start,end or top, bottom of the layout.
The children can be laid out vertically or horizontally by providing the LinearOrientation property a Vertical or Horizontal Orientation.
LinearAlignment defines where the children should start being positioned from, useful if the children do not use all the space of the parent.
| Property | Type | Description |
|---|---|---|
| LinearAlignment | LinearLayout.Alignment | Gets/Set the global child alignment to be used |
| LinearOrientation | LinearLayout.Orientation | Gets/Sets Orientation of the linear layout, vertical or horizontal |
| CellPadding | Size2D | Gets/Sets Spacing between the cells, horizontal space and vertical space |
AlignmentType
By default items are aligned at the Top, Begin. Choose from the below alignment options
| Alignment | Info |
|---|---|
| Begin | |
| End | |
| CenterHorizontal | Vetical will be set to top |
| Top | |
| Bottom | |
| CenterVertical | Horizontal will be set to start |
| Center | Both vertical and horizontal are centered |
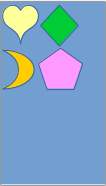
Grid Layout
Positions children in a grid form, the cells are of uniform size based on the first child added to the parent View. The number of columns can be specified and the rows will automatically increased to hold the children. Once the available space is used up further rows will not be added.
| Property | Type | Description |
|---|---|---|
| Columns | int | Gets/Sets the number of columns in the Grid |
Flex Layout
A layout which provides features like wrapping so if items no long fit on an axis they can automatically be positioned on another row or column.
Justification applies to the flex Direction axis whilst Alignment is the (other) cross axis. Changing the Direction will apply the Justification to the new direction.
Natural size of items are used which can be different for each item.
Setting the size of an item has no effect.
| Property | Type | Description |
|---|---|---|
| Direction | FlexDirection | The orientation the flex items are laid out in (Column/Row) |
| Justification | FlexJustification | Alignment of items along the flex axis when free space available |
| Alignment | AlignmentType | Alignment of items along the cross axis when free space available |
| WrapType | FlexWrapType | Enable wrapping of items |
Creating Custom Layouts
OnMeasure and OnLayout
Custom layouts can be created for use in applications or to add to the current “Toolkit”.
The custom layout must derive from LayoutGroup and override the 2 methods OnMeasure and OnLayout described below.
The layouting framework does all the heavy work leaving just the Measuring and Layouting to the Custom Layout.
Layouting is a 2 phase process. First Measuring of the children hence determining the layouts own dimensions. Second Layouting the children within itself using their measured sizes. (Positioning the children)
protected override void OnMeasure( MeasureSpecification widthMeasureSpec, MeasureSpecification heightMeasureSpec )
The OnMeasure is the first function to override, 2 parameters are provided, it’s the parents width and height MeasureSpecifications which impose the size the custom layout can be.
The Custom layout should then measuure it’s children. Ti help with measuring children a MeasureChild API is available along with a _children which is an List of the Layouts children, it can be used to iterate and Measure each one.
After the children are measure the Custom Layout can add up their height and widths in any way it needs to. Finally calling the SetMeasuredDimensions API with the size it needs to be.
protected override void OnLayout( bool changed, LayoutLength left, LayoutLength top, LayoutLength right, LayoutLength bottom )
The OnLayout is where the children are positioned using the Layout API which takes a frame; start, top, end, bottom. The positioning of the vertices of the child in turn defines it’s size.
As in the OnMeasure the _children List can be iterated to get each child in the Layout, then the MeasuredWidth and MeasuredHeight can be queried on each child.
LayoutLength
LayoutLength is a class which encapsulates either the height or width value used in Layouting. The value can be set by passing in a int or float and retrieved as a decimal or rounded value. The rounded value should be used when outputting e.g when setting measured dimensions. The decimal value should be used during calculations.
It is up to the layout to deal with the floating point to rounded number differences. For example dividing a length of 100 between 3 columns could result in a column 33,34,33. Which would be preferable to 33,33,33 and 1 being undefined.
Example code for a Custom Layout positioning children in a horizontal line.
using Tizen.NUI;
using Tizen.NUI.BaseComponents;

namespace SimpleLayout
{
    internal class CustomLayout : LayoutGroup
    {
        protected override void OnMeasure( MeasureSpecification widthMeasureSpec, MeasureSpecification heightMeasureSpec )
        {
            var accumulatedWidth = new LayoutLength(0);
            var maxHeight = 0;
            var measuredWidth = new LayoutLength(0);
            LayoutLength measuredHeight = new LayoutLength(0) ;
            MeasureSpecification.ModeType widthMode = widthMeasureSpec.Mode;
            MeasureSpecification.ModeType heightMode = heightMeasureSpec.Mode;

            bool isWidthExact = (widthMode == MeasureSpecification.ModeType.Exactly);
            bool isHeightExact = (heightMode == MeasureSpecification.ModeType.Exactly);

            // In this layout we will:
            //  Measuring the layout with the children in a horizontal configuration, one after another
            //  Set the required width to be the accumulated width of our children
            //  Set the required height to be the maximum height of any of our children

            foreach (LayoutItem childLayout in _children)
            {
                if( childLayout != null )
                {
                    MeasureChild( childLayout, widthMeasureSpec, heightMeasureSpec );
                    accumulatedWidth += childLayout.MeasuredWidth.Size;
                    maxHeight = (int)System.Math.Ceiling(System.Math.Max( childLayout.MeasuredHeight.Size.AsRoundedValue(), maxHeight ));
                }
            }

            measuredHeight = new LayoutLength(maxHeight);
            measuredWidth = accumulatedWidth;

            if( isWidthExact )
            {
                measuredWidth = new LayoutLength( widthMeasureSpec.Size );
            }

            if( isHeightExact )
            {
                measuredHeight = new LayoutLength( heightMeasureSpec.Size );
            }

            // Finally, call this method to set the dimensions we would like
            SetMeasuredDimensions( new MeasuredSize( measuredWidth, MeasuredSize.StateType.MeasuredSizeOK),
                                   new MeasuredSize( measuredHeight, MeasuredSize.StateType.MeasuredSizeOK) );
        }

        protected override void OnLayout( bool changed, LayoutLength left, LayoutLength top, LayoutLength right, LayoutLength bottom )
        {
            LayoutLength childLeft = new LayoutLength( 0 );

            // We want to vertically align the children to the middle
            LayoutLength height = bottom - top;
            float middle = height.AsDecimal() / 2;

            // Horizontally align the children to the middle of the space they are given too
            LayoutLength width = right - left;
            int count = _children.Count;
            int childIncrement = 0;
            if (count > 0)
            {
                childIncrement = (int)System.Math.Ceiling(width.AsDecimal() /  count);
            }
            float center = childIncrement / 2;

            // Check layout direction
            var view = GetOwner();
            ViewLayoutDirectionType layoutDirection = view.LayoutDirection;

            for ( int i = 0; i < count; i++ )
            {
                int itemIndex = i;
                // If RTL, then layout the last item first
                if (layoutDirection == ViewLayoutDirectionType.RTL)
                {
                    itemIndex = count - 1 - i;
                }

                LayoutItem childLayout = _children[itemIndex];
                if(childLayout != null)
                {
                    LayoutLength childWidth = childLayout.MeasuredWidth.Size;
                    LayoutLength childHeight = childLayout.MeasuredHeight.Size;

                    LayoutLength childTop = new LayoutLength(middle - (childHeight.AsDecimal()/2));

                    LayoutLength leftPosition = new LayoutLength(childLeft.AsDecimal() + center - childWidth.AsDecimal()/2);

                    childLayout.Layout( leftPosition,
                                        childTop,
                                        leftPosition + childWidth,
                                        childTop + childHeight );
                    childLeft += new LayoutLength(childIncrement);
                }
            }
        }
    }
}